Tuesday, September 10, 2019

Pz.Inż.126, or 7TP, or Vickers E, or T-26... or tank in Sci-Fi - chapter 3

The model of the tank is almost ready. I want to make some more details, eg anti-cumulative screens and some scrap, maybe sandbags. I wonder yet. In the meantime, I started thinking about building a stand - diorama. Maybe it will not be a diorama but a vignette.
Model czołgu już prawie gotowy. Chcę jeszcze dorobić kilka detali, np. ekrany przeciw-kumulacyjne i jakiś złom, może worki z piaskiem. Zastanawiam się jeszcze. W międzyczasie zacząłem myśleć nad budową podstawki – dioramy. No, może nie dioramy, ale winiety.


I was looking for the right topic for my vignette. Because I plan to add a Soviet crew to the tank, I decided to add something with a Soviet accent on the vignette. The last known topic in the press were Soviet monuments in Poland - that's why the choice is a monument. I searched the Internet, got acquainted with the eastern art of such objects. Most contained a red star or a sickle and a hammer. Two of the most well-known symbols.
Szukałem odpowiedniego tematu. Ponieważ do czołgu planuje dodać sowiecką załogę, postanowiłem dodać na winiecie coś z sowieckim akcentem. Ostatnio głośnym tematem były sowieckie pomniki na terenie naszego kraju – dlatego wybór padł na pomnik, monument. Przeszukałem Internet, zapoznałem się ze wschodnią sztuką budowania takich obiektów pamięci. Większość zawierała czerwoną gwiazdę lub sierp i młot. Dwa najbardziej znane symbole.


Almost all the monuments that I have seen are very high. They are often quite large squares, on which there is a huge monument - a mausoleum. I did not want to do such a large object. I wanted the monument to be not much taller than the tank - no more than twice the height of the tank. A few minutes of work in the computer and I had a ready draft of the monument.
Niemalże wszystkie pomniki, które widziałem są bardzo wysokie. Często są to sporych rozmiarów place, na których stoi ogromny pomnik – mauzoleum. Nie chciałem robić tak dużego. Zależało mi żeby nie przewyższał czołgu nie bardziej jak jego dwukrotna wysokość. Kilka minut pracy w komputerze i miałem gotowy szkic pomnika.


I built the basis of the vignette using my favorite method. First the construction of grating. Around the grating, I put on a plastic strap. Then I added finishing elements - a pavement and a monument. Everything made of plastic sheets.
Podstawę winiety budowałem moją ulubioną metodą. Najpierw budowa kratownicy, na to obręcz obłożona paskiem, a dalej elementy wykańczające całość - chodnik, droga z kostki brukowej, etc. Wszystko wykonane z plastikowych arkuszy.


I made a paving from plastic sheet. I wanted to arrange the cubes irregularly.
Kostkę brukową wykonałem z arkusza plastiku. Zależało mi na nieregularnym ułożeniu kostek.


There is still a lot of work left ... But I don't give up. I am going to finish this project!
Pozostało jeszcze sporo pracy... Ale nie poddaję się. Mam zamiar skończyć ten projekt!


To be continued...
Ciąg dalszy nastąpi...


Tuesday, July 2, 2019

Pz.Inż.126, or 7TP, or Vickers E, or T-26... or tank in Sci-Fi - chapter 2

Continuation of the show of works on the unknown model... What has changed in the model since the last entry on my blog?
Ciąg dalszy prac nad bliżej nieznanym modelem... Co się zmieniło od ostatniego wpisu na moim blogu?


First. I exchanged tank tracks for new ones. The package contains rubber straps that do not look like tank tracks. I bought a new one from RPM (cat. no. 35901), which are much better. I glued the tracks completely, but I did not permanently mount the wheels. Thanks to this I can take off these parts and paint them separately. The effects of my work are presented below.
Po pierwsze. Wymieniłem gąsienice na nowe. W opakowaniu są gumowe paski, które nie przypominają gąsienic. Zakupiłem nowe z firmy RPM (nr. kat. 35901), które są znacznie lepsze. Gąsienice skleiłem w całości, ale nie wklejałem kół. Dzięki temu mogę zdjąć te części i pomalować je osobno. Efekty mojej pracy poniżej.


Secondly. I assembled the revolving gun. I still do not like it, but it looks better than the first version.
Po drugie. Zmontowałem działo obrotowe. Nadal mi się nie podoba, ale wygląda lepiej niż w pierwotnej wersji.


Thirdly. I worked on suspension bogie. The end result is terrible. I have only refined these parts from the outside. I also added imitation screws. I keep telling myself that I treat this model as fun and exercise.
Po trzecie. Pracowałem nad wózkami kół. Efekt końcowy jest okropny. Części te dopracowałem tylko od zewnątrz. Dodałem też imitacje śrub. Cały czas powtarzam sobie, że ten model traktuję jako zabawę i ćwiczenie.


Fourthly. A few new rivets appeared on the hull and a holder for spare links of tank tracks.
Po czwarte. Na kadłubie pojawiło się kilka nowych nitów oraz uchwyt na zapasowe ogniwa gąsienic.


In my head I'm planning to make a mini vignette. For sure it will be smaller than the tank's outline.
W głowie układam sobie plan wykonania mini winiety. Na pewno będzie mniejsza od obrysu czołgu.


I'm self-critical and I know that this model looks terrible. But maybe I can cover the failures through weathering, dust, mud, etc.
Jestem samokrytyczny i wiem, że ten model wygląda okropnie. Ale może uda mi się zasłonić niedoróbki poprzez weathering, kurz, błoto, itp.


Keep finger crossed. See You soon...
Trzymajcie kciuki. Do zobaczenia wkrótce...


Tuesday, April 30, 2019

Pz.Inż.126, or 7TP, or Vickers E, or T-26... or tank in Sci-Fi

FOREWORD
SŁOWEM WSTĘPU


I came back to work on the Pz.Inż.126 tank after a very long time. I started to build it in 2013. I left the model because I had no idea how to modify it.
Do pracy nad czołgiem Pz.Inż.126 wróciłem po bardzo długim czasie. Zacząłem budować go już w 2013 r. Model odstawiłem ponieważ nie miałem pomysłu na to jak go zmodyfikować.


Earlier, I was showing this work on my official website [konstruktor.uznam.net.pl], unfortunately the provider has suspended the service of placing pages on the server. I managed to find all the photos from previously performed works from another of my pages posted in Google Sites
Wcześniej opis prac prowadziłem na mojej oficjalnej stronie [konstruktor.uznam.net.pl], niestety dostawca zawiesił usługę zamieszczania stron an serwerze. Udało mi się odnaleźć wszystkie zdjęcia z wykonanych dotychczas prac z innej mojej strony zamieszczonej w Google Sites..


What is the problem with this model? Why did it last so long? The model itself is not made badly. The problem was when I tried to establish his identity. In search of information about the Pz Inż 126 tank, it was supposed to be a pure fiction of the model's manufacturer. However, such a vehicle actually existed but under the name: T-26 (USSR, produced: 1931-1940), Vickers E (Great Britain, produced: 1932-1938) or also 7TP (Poland, produced: 1935-1939). Of course, these are examples of individual versions of this tank, because there were more of them.

Then I decided that I would not make a model based on the original. I started to build it in a more science-fiction version. I knew that I would have more opportunities to check some new techniques or ideas for making new parts.
W czym tkwi problem związany z tym modelem? Dlaczego tak długo trwała jego budowa? Model sam w sobie nie jest wykonany źle. Problem pojawił się kiedy próbowałem ustalić jego tożsamość. W poszukiwaniu informacji o czołgu PZ. Inż. 126 miało okazać się, że jest to czysta fikcja producenta modelu. Jednakże taki pojazd istniał faktycznie ale pod nazwą: T-26 (ZSRR, produkowany: 1931-1940), Vickers E (Wielka Brytania, produkowany: 1932-1938) czy też 7TP (Polska, produkowany: 1935-1939). Oczywiście, są to przykłady pojedynczych wersji tego czołgu, bo było ich więcej.

Wtedy postanowiłem, że nie będę robił modelu opartego na pierwowzorze. Mogłem wykonać go w wersji bardziej science-fiction. Będę miał większe pole manewru do sprawdzenia kilku nowych technik czy pomysłów na dorobienie elementów.


BUILDING OF THE MODEL
BUDOWA MODELU


A few paragraphs above I gave the page leading to an earlier relationship with the construction of the model. From that moment, the model lay in a box and waited for further work. Nothing has changed.
Kilka akapitów wyżej podałem stronę prowadzącą do wcześniejszej relacji z budowy modelu. Od tamtego momentu model leżał w pudełku i czekał na dalsze prace. Nic się nie zmieniło.


Several new elements appeared on the hull. An example is the front hatch, which has been converted into a shooting station. What was supposed to imitate the ventilation shutters (?) was changed into a round intake with a mesh. The upper hatch has also been rebuilt. All white elements shown in the pictures are new.x
Na kadłubie pojawiło się kilka nowych elementów. Przykładem jest przedni właz, który został zamieniony na stanowisko strzelnicze. To co miało imitować żaluzje wentylacji (?), zostało zamienione na okrągły wlot z siatką. Przebudowany też został górny właz. Wszystkie białe elementy pokazane na zdjęciach są nowe.


The original gun was turned into a gutling gun. I made them from plastic profiles and injection needles. Explanation: Because the model concerns WWII, and such weapons were not used then, and this is a model based on fiction, so I made such a gun.
Pierwotne działko zostało zamienione na działko obrotowe. Zrobiłem je z profili plastikowych i igieł iniekcyjnych. Wyjaśnienie: Ponieważ model dotyczy II WŚ, a takich dział wtedy nie stosowano, a jest to model oparty na fikcji, to takie działko zrobiłem.


I'm working on more elements. I have some new ideas. But about this in the next post.
Pracuję nad kolejnymi elementami. Mam kilka nowych pomysłów. Ale o tym w kolejnym wpisie.


TO BE CONTINUED...
CIĄG DALSZY NASTĄPI...


Wednesday, December 19, 2018

Building model without tools? / Budowa modeli bez narzędzi?

Many times I bought a "souvenir" during my vacation, but I did not have any tools. I can not wait and I want to build this model. What to do then?
Wiele razy kupiłem sobie "pamiątkę" podczas urlopu i nie miałem jak jej skleić z jednego prozaicznego powodu, czyli braku mojej skrzynki z narzędziami. Przychodzi taki moment, że owa "pamiątka" zaczyna kusić. Nachodzi ochota by choć trochę podłubać. Co wtedy?


I asked myself a question; Is it possible to build a model without tools? The first thing I thought was that I built the first models with one hobby knife, sandpaper and a small file. Then this set of tools was enough. Now, I demand from myself and the results of my work, much more.
Zadałem sobie pytanie; czy da się skleić model bez narzędzi? Pierwsze co przyszło mi na myśl to, to, że pierwsze modele sklejałem mając jeden skalpel, papier ścierny i pilniczek. Wtedy taki zestaw wystarczał. Teraz, wymagam od siebie i efektów mojej pracy, znacznie więcej.

I decided to carry out an experiment and build a model using only a few tools: a hobby knife, sandpaper and glue. These are the cheapest tools and quite widely available. Today, glue can be bought in almost every toy store. If we do not have glue, we can always use a clear nail polish...
Postanowiłem przeprowadzić eksperyment i zbudować model używając tylko kilku narzędzi: nożyka do tapet, papieru ściernego i kleju. Są to najtańsze narzędzia i dość powszechnie dostępne. Klej obecnie można kupić w prawie każdym sklepie zabawkowym. Jeżeli nie mamy kleju, zawsze możemy użyć bezbarwnego lakieru do paznokci...

I did an experiment on the Revell model - PzKpfw V "PANTHER" Ausf. G (Sd.Kfz. 171) in the 1:72 scale (catalog number: 03171). The model is very nice. It's easy to build, of course there are a few places that need fixing, but the overall assessment is good. In the picture below you can see the partially folded model. The bag contains parts ready for assembly
Eksperymentowałem na modelu firmy Revell - PzKpfw V "PANTHER" Ausf. G (Sd. Kfz. 171) w skali 1:72 (nr katalogowy: 03171). Model jest bardzo fajny. Łatwo się skleja, ma oczywiście kilka miejsc, które wymagają poprawki, ale całościowa ocena to czwórka z plusem. Na zdjęciu poniżej widać model złożony częściowo. W woreczku znajdują się przygotowane do montażu części


It was left to me to build and paint the model. Of course, the whole experiment is just fun. Maybe in the future I can make a movie and show that building a model with a few tools is possible.
Pozostaje złożyć i pomalować model. Oczywiście cały eksperyment to tylko zabawa. Może w przyszłości uda mi się nakręcić film i pokazać, że sklejenie modelu przy pomocy kilku narzędzi jest możliwe.

Try it yourself! I wish you good luck and have fun!
Spróbujcie sami! Polecam! I życzę powodzenia i miłej zabawy!

Tuesday, May 15, 2018

German motorcycle R12 in Swinemünde - Vignette (Zvezda)

For a long time I have intended to make any model related to my city. However, I did not want it to relate to an event clearly recorded in the pages of history. I was more interested in showing a small element that was once in the city. I chose the period of World War II.

I searched internet forums, photo collections, etc. I was looking for an interesting object that could be on my vignette.

I chose the unusual advertising column. In my opinion, quite interesting. Below I place two old photos.
Od dłuższego już czasu zamierzałem zrobić jakikolwiek model związany z moim miastem. Nie chciałem jednak żeby dotyczyło to jakiegoś wydarzenia wyraźnie zapisanego na kartach historii. Bardziej zależało mi na pokazaniu małego elementu, który był kiedyś na terenie miasta. Wybrałem okres II wojny światowej.

Przeszukałem fora internetowe, zbiory zdjęć, itp. w poszukiwaniu ciekawego elementu, który mógłby znaleźć się na mojej winietce.

Wybór padł na słup ogłoszeniowy. Moim zdaniem dość ciekawy. Poniżej zamieszczam dwa stare zdjęcia.


The biggest problem was making a column sketch. Fortunately, the building visible on the colored photograph still stands today. Two visible towers exist in an unchanged form. I went to the place and measured the heights of both towers and their spacing and a few other dimensions.

I adjusted the towers in the picture to the appropriate dimensions in the graphic program. Then I rescaled everything. I drew the contours of the advertising column. Thanks to this I obtained a template for its 1:35 scale cut.
Największym problemem było wykonanie szkicu słupa. Na szczęście budynek widoczny na kolorowej fotografii stoi do dziś. Dwie widoczne wieże istnieją w niezmienionej formie. Udałem się na miejsce zmierzyłem wysokości obydwu wież oraz ich rozstaw i jeszcze kilka innych wymiarów.

Dopasowałem wieże na zdjęciu do odpowiednich wymiarów w programie graficznym. Następnie przeskalowałem wszystko. Rozrysowałem kontury słupa ogłoszeniowego. Dzięki temu uzyskałem szablon do jego wycięcia w skali 1:35.


To be continued...
Ciąg dalszy nastąpi...


Friday, September 30, 2016

Ruined House and 7.5 cm ANTI-TANK GUN PAK 40/L46 Battle Diorama [TAMIYA, 1:35, 35047]

I have a lot of models that are in boxes in my stock. I was wondering how I can combine them to build for example a diorama. It turned out that I have enough kits to make such combinations.
Nadmiar modeli w szafie zmusił mnie do podjęcia decyzji, które modele mogę wykonać jednocześnie. Zastanawiałem się, które modele mogę połączyć tak by wykorzystać je np. do budowy dioramy. Okazało się, że mam dość zestawów by zrobić takie kombinacje.


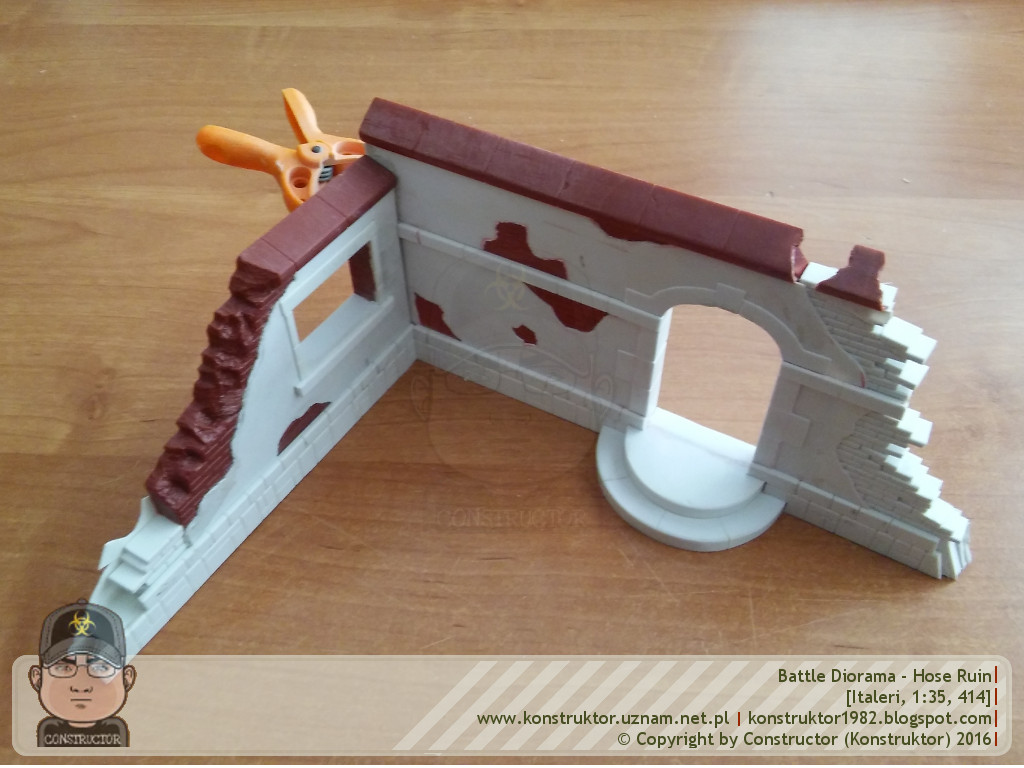
I found in my stock one of the older models from ITALERI "House Ruin" in 1:35 scale [no. Cat. 414, '95]. I bought it for about 4 EUR in a toy store. Model looks like diorama for battle games (wargaming). I also have several models of anti-aircraft guns. Most of them are models from Tamiya.
Znalazłem jeden ze starszych modeli ITALERI "House Ruin" w skali 1:35 [nr. kat. 414]. Kupiłem go kiedyś za 15 PLN w jakimś sklepie z zabawkami. Model wygląda jakby był przygotowany do budowy dioramy do gier bitewnych (wargaming). W szafie mam też kilka modeli dział przeciwlotniczych. W większości są to modele firmy TAMIYA.


Model of ITALERI as you can see in the photographs is quite poor in detail. No details in places where they should be such as defects in the plaster walls makes parts flat.
Makieta ITALERI jak widać na fotografiach jest dość uboga w detale. Brak wypukłości w miejscach gdzie powinny być ubytki w tynku czy detale ścian, powodują, że elementy wyglądają bardzo płasko.


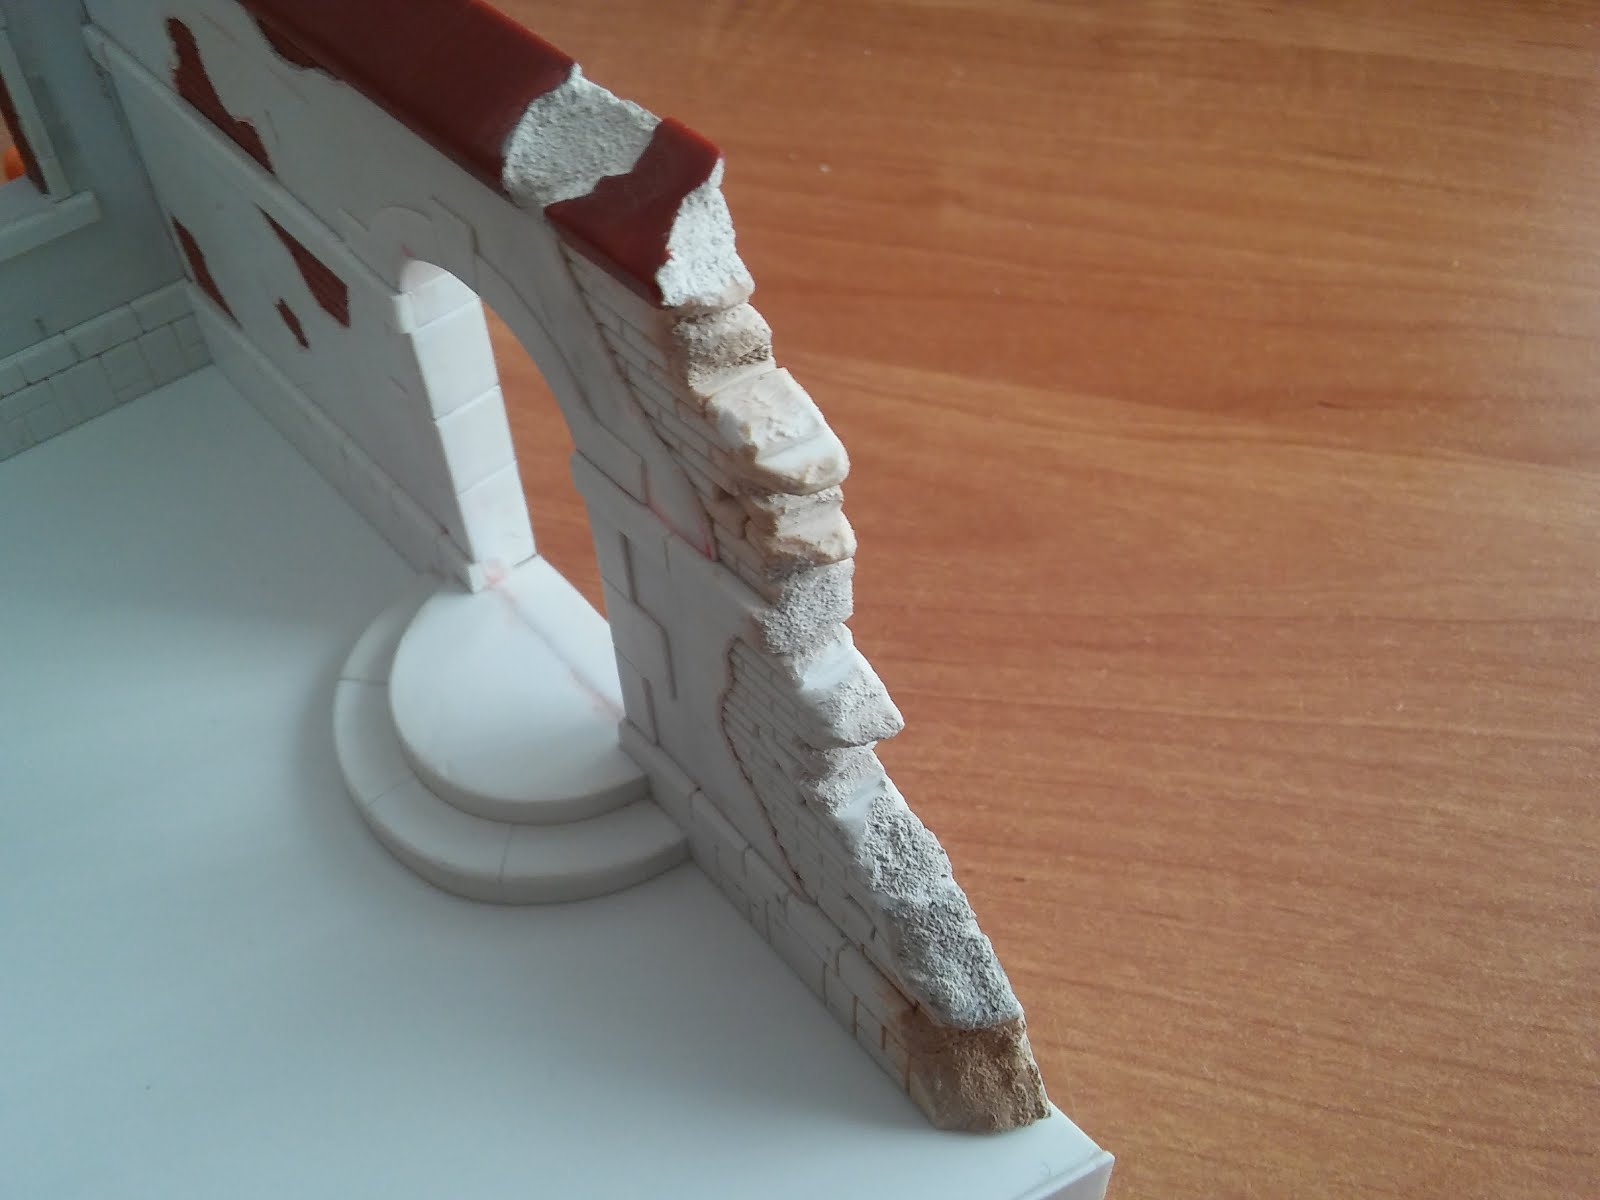
I removed some plastic from one of the walls and I added destroyed bricks.
Usunąłem fragment jednej ze ścian i dodałem zniszczone cegły.


On the wall I've put on strips of plastic to make them more realistic. It took me a little time.
Na części modeli dokleiłem paski plastiku tak by nadać wypukłości ścianom. Zajęło mi to niewiele czasu.


I also added the stairs, windows, and I remade the door.
Dodałem też schodki, okna, oraz przerobiłem drzwi.


After adding almost all the details, I checked whether these walls fit together.
Po dodaniu niemalże wszystkich detali przymierzyłem do siebie obydwie części ściany.


I joined both halves of the walls. I checked whether they fit into the base of dioramas. I came to the conclusion that the place of walls on the flat surface looked quite dull. That's why I added an extra band under the walls. Now the walls are not sited directly on the ground.
Przymierzyłem obydwie już sklejone ściany do przygotowanej wcześniej podstawy dioramy. Doszedłem do wniosku, że postawienie ścian na takiej płaskiej powierzchni wyglądało dość nieciekawie. Dlatego też dodałem dodatkową opaskę przed ścianami. Teraz ściany nie są posadowione bezpośrednio na gruncie.


The pictures show finished destroyed brick. It is still necessary to add a little debris to the ground.
Wykończyłem ukruszone cegły. Konieczne jest jeszcze dodanie trochę gruzu przy gruncie.


In the next post I will show more items added to the diorama. They will include window, door, the road that leads to the stairs, details of the building, etc.
W kolejnym wpisie pokażę kolejne elementy dodane na dioramie. Będą to m.in. okno, drzwi, droga prowadząca do schodów, dodatki do budynku, itp.

Wednesday, January 27, 2016

T65 X-Wing Starfighter

Another old model for repair!! Now it's time for T65 X-Wing Starfighter!! I built this model about 20 years ago. Unfortunately, this model have not survived moving home. During disassembling the model to parts, it turned out that each could be dismantled without resistance. To build the model I use these two glues: Revell 39606 Liquide Special and Revell 39602 Klej Contacta Cement. A lot of parts were damaged before disassembly.


I started the repairment of wings. Once again, I watched the movie and search for photos and blueprints on the Internet. I added a few changes in the wings. On the photo below You can see that desing of inner parts of the wings was not accurate. I added piece of plastic.


The wings were bent a bit. This can be seen in the closed position. I had to add neodymium magnets at the ends of the wings.


Thursday, June 12, 2014

Dunsfold Aerodrome - Top Gear Race Track


I needed a good background to take pictures. I've always done it on a white background. I came up with the idea to do stand to product images. I liked these signs on the runway at the airport in Dunsfold Aerodrome. Place known as the Top Gear Race Track. It was enough to 30 minutes, so I did the background.
YYY


...☺

Thursday, December 12, 2013

Fortress gate to “West Complex Fortress”

Location ...

The gate is located in Poland (Europe) on the Usedom Island (in Polish: Uznam), on the Jachtowa street. Geographical coordinates are 53.916213,14.274155. The gate is located at “West Complex Fortress”. Below is map with the exact location.


A Brief History of ...

Fortress gate to “West Complex Fortress” was probably built in the years 1870-1880. From the beginning the gate was a land crossing to the island where is West Fort, also known as Redoubts. The gate was used not only for transport - it was used for defensive function - it was caponier. The gate consists of two pairs of columns. Each pair of columns also has two heavy steel gate, riveted. Between pairs of columns there is a wall. In each wall are located to the openings for shooting positions. Looking from the entrance - behind the gate was a moat. In the columns are located to the metal parts (wheels), which probably were used to raise the bridge.

Restoration ...

For many years, the gate was in the power of occupants who attacked Poland. In the 90's the Polish authorities took control of the entire fort complex. Buildings, fort, shelters, the gate was destroyed by vandals. City councilors were not interested about the situation of these buildings. Nature also tried to regain what once belonged to it. In 2011, the city councils decided to renovate the gate - now it is a monument. [more in polish article on eswinoujscie.pl] Gate regained its former appearance. Unfortunately bridge was not rebuilt. The moat is only a shadow of what could be in the beginning.

Exhibition and competition ...

I am determined to build this diorama. I really would want to present this diorama in the contest. The competition and exhibition for modelers is called "Szczecinski Paprykarz Modelarski"1 (more about SPM). I don't take part in the contest with the intention of winning. I want to show my diorama and take a good time with my family.


1 Szczecinski Paprykarz is the most famous fish paste from Szczecin (Poland). More in the Wikipedia.


Monday, November 18, 2013

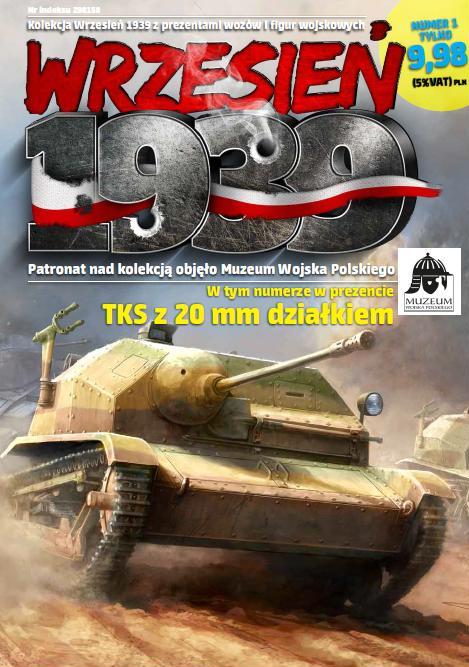
The collection of "Wrzesień 1939" (September 1939)

Note! The following entry is not a form of advertising! This is my review!

The day before yesterday, I got from my dad publication of a series of "September 1939". Newspaper was published with plastic model, which will be part of the collection of armoured vehicles of the September Campaign. First model is TKS with 20 mm cannon.


At first I was very skeptical. I asked myself, that the model in a newspaper for 2.5 Euro can be made in good quality? Now I know this may be true. The package includes a toothpick (for glue), glue, and most important, the model. To build the model, the manufacturer has prepared 12 parts. Precision of these parts is a very positive surprise!

I've already bought two sets! I'll buy another 2 and will use to build a diorama!

More information will be soon ...

Friday, August 23, 2013

2000 views!

Thank You all for watching my blog! Now counter shows over 2000 views, but I hope there will be more! And once again I thank You all very much! Soon I will show more galleries of my models. I have prepared a lot of posts, with galleries showing, assembling of my models.Now I'm busy because of my little son. I have to do extreme makeover in my flat. Still don't have much time for my hobby. Please visit my blog and write some comments about my works.

THANK YOU ALL !!


Tuesday, May 21, 2013

Cannon 150 mm SK C/28 (chapter - 4)

I decided that the first element of the model cannon, will be pedestal. This is the easiest part of the model. When I build the pedestal, I'll be able to build the rest of the model on it. Since this is the first model that I'm designing, I want to design it perfectly. I drew a pedestal as a 3D solid. I have unfolded this item on sheets. Pedestal will consist of 10-15 parts.

Saturday, May 4, 2013

Cannon 150 mm SK C/28 (chapter - 3)

This time only photos ...


Monday, April 22, 2013

Cannon 150 mm SK C/28 (chapter - 2)

At the beginning of the project I wanted to build a diorama that would be the sizable part of the fort. I have to admit that I started to build this diorama in such a large size. However, the amount of materials that I would have to use a scared me. On photo below You can see rendered project of whole diorama. The second picture shows the diorama of how it looked during building.


In a previous post I wrote that all digital drawings and pictures are lost. Some of them I found on a CD and on the Internet. Unfortunately, 3D CAD design I had lost for good. But I did not give up. I design from the beginning drawings of cannon and diorama.


The greatest difficulty in designing the cannon is fact that I don't have any archival plans or sketches. And I don't know where I can get them. Whole designing is based on photos from internet. All of them are made in perspective. In that case it's hard to make some measurements. That's why I have to do everything approximate.


Thursday, April 18, 2013

Cannon 150 mm SK C/28 (chapter - 1)

So, I presented another return to gallery of unfinished models. This time it will be diorama of German stronghold (fort) placed in Swinoujscie city. You can read about history of this stronghold on official site by clicking on this adress: West Fortification in Swinoujscie.

Of course, my diorama, will be shows one part of the fort. It will be artillery stand for 150 mm SK C/28 cannon (SK - Schnell-Lade-Kanone, C - Construktionsjahr). Work on this cannon I started about 2 years ago. I had to stop this project because I had problems with my job. Then in my laptop hard drive has been damage, all the data too.

I was searching all CD with data in my home. After hours of searching, I found some photos, sketches, and digital projects of the cannon. Better than nothing. I decided not to give up and restore all the information and drawings.

If anyone has any plans, drawings or information about this cannon please contact me!

Sunday, April 14, 2013

1000 watches!


Thank You all for watching my blog! Now counter shows 1000 views, but I hope there will be more! And once again I thank You all very much!
YYY


Friday, April 12, 2013

Soviet T.34 with diorama battle display (chapter - 6)

Another busy day - a lot of hard work. After dealing with missing exhaust pipe came time to improve other parts of the model. Let me remind you that the work on the T.34 is restoration of this model and diorama base.

I thought about replacing the Matchbox model to model from another company. The same situation as in the model of Krupp-Protz-diorama. But I do not want another cost. The cost of the new T.34 is about 9 Euro. The work on the model is extended too much...

On photos below You can see new antenna. I don't remember if it was in set from Matchbox. I also installed a missing exhaust pipes.


Saturday, April 6, 2013

Soviet T.34 with diorama battle display (chapter - 5)

After a long break I decided to scrape a little on my T.34. Last time when I was working on this model it was April 3rd. Let me remind you that I'm trying to finish six projects: Harbour Tug Boat from Revell, M151A2 Tow Missile Launcher, Krupp-Protz Kfz.69 - diorama, Cannon 150 mm SK C/28, Pz. Eng 126 and including T.34.

I want to end this madness. So I start to complete models that require little work to finish them. Yesterday while I was working, my son cheered me. He shouted at me: dad, dad, dad (of course in Polish it means tata, tata, tata). Several times he hit me with something in his hand. Fortunately, I had no injuries. It was a sign that I have to finish the work. Thank you, my son, for accelerating the pace of my work.

Let us return to the subject of the model. I lost one of the exhaust pipe. I could not do just only one new exhaust. This new exhaust pipe differentiate it from the original. I had to do two new ones. The result of my work you can see on the picture below.All I can say is that those exhaust pipes are only imitation of original pipes. Better than nothing.


Wednesday, April 3, 2013

Soviet T.34 with diorama battle display (chapter - 4)


Let's return to the topic of T.34 tank and diorama battle. For a few days I was working on tracks-marks that's left by the tank treads. I think that I spent too much time on these tracks-marks. But the effect is satisfactory for me, and better than the prototype.
YYY


I promised that I will use the photo-comparison, and make it happen. The opinion of what I've done I leave you readers. I care for each evaluation and comments. So write what do you think about my work.
YYY


From now on, I will start work on the tank. The diorama still needs a few details. About those details I wrote in previous posts. So I get back to work. Stay tuned for another post soon.
YYY


Wednesday, March 27, 2013

Soviet T.34 with diorama battle display (chapter - 3)

XXX
Ciąg dalszy zabawy z dioramą T.34.Ślady po gąsienicach czołgu wyglądają jak odciśnięte w błocie. Ponieważ nie mam ochoty robić błyszczącej podstawki zmusiło mnie to do zmiany wyglądu dotychczasowych śladów. W tym celu wypełnię miejsca pokazane na poniższej fotografii masą plastyczną samoutwardzalną.


XXX
Na front poszła Masa modelarska chemoutwardzalna firmy WAMOD. Już nie pierwszy raz korzystam z tego specyfiku. Jego cena waha się w granicach 12 - 17 PLN. Jak widać na fotografii mi udało się kupić masę za 15 PLN.


XXX
Drugi specyfik to POXILINA dwuskładnikowa. Tężeje po około jednej godzinie. W instrukcji producent zapewnia, że materiał ten nadaje się do obróbki mechanicznej nawet drobnymi narzędziami.


XXX
Fotografia poniżej przedstawia porównanie odcisków wykonanych w POXILINIE (po lewej) oraz w masie WAMOD'u (po prawej). Próby przeprowadzałem na pudełku od płyty CD (czarna tylna strona). WAMOD w miarę dobrze trzymał się podłoża, niestety POXILINA odpadła po delikatnym podważeniu. WAMOD nie poddał się tak łatwo.


XXX
Postaram się jak najszybciej wrzucić zdjęcia z nowymi śladami po gąsienicach. Czekam aż WAMOD wyschnie i oszlifuję naddatki materiału, zamontuję płotki i położę podkład.


XXX
Na marginesie: Poniżej próba techniczna zestawienia dwóch zdjęć, ot taka "porównywarka - efektu przed i po". Będę się starał w przyszłości użyć jej od czasu do czasu.